From Canadian Walnut Slab to Finished Dining Table: Our Building Process
Ever wondered what actually happens between ordering a custom table and having it delivered to your home? Here is a step-by-step look at how we build a custom walnut dining table in Calgary.
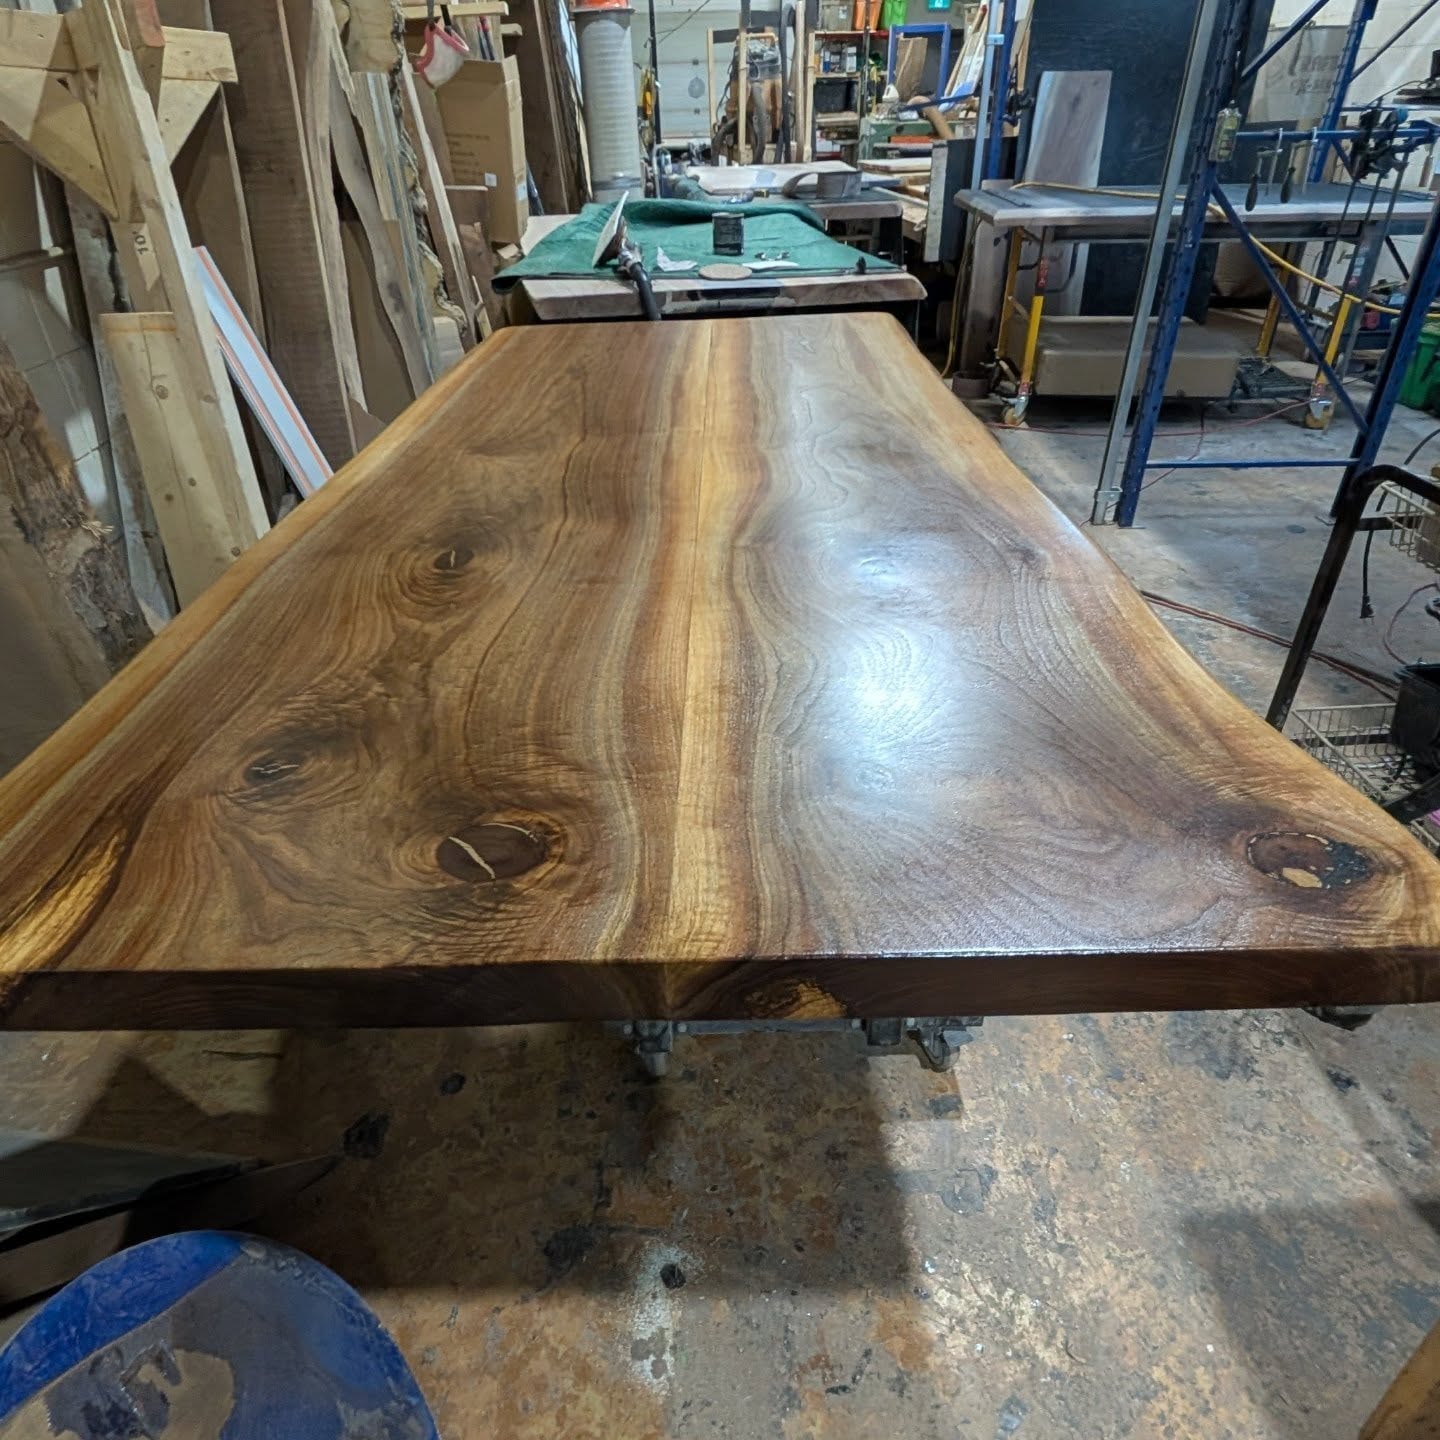
One of the questions we hear most often from customers is: "What actually happens after I place my order?" It's a fair question. When you're spending $2,500–$6,000 on a custom dining table, you want to know exactly what you're getting and how it's being made.
This is a step-by-step look at how we build a custom walnut dining table at Calgary Wood Works — from the moment a slab arrives in our shop to the day it's delivered to your home.
Step 1: Slab Selection and Sourcing
Every custom table starts with the wood. We source our Canadian walnut slabs from trusted suppliers across Alberta and British Columbia, selecting for width, length, grain character, and overall quality.
When a customer orders a custom table, we photograph the available slabs that match their specifications and share the options before the build begins. You choose the specific slab — not a generic "walnut table." This is one of the things that makes a custom table genuinely different from a production piece.
Once you've selected your slab, we verify its moisture content with a calibrated moisture meter. We're looking for 6–8% for indoor furniture in Alberta. If the slab needs additional drying time, we'll let you know before the build begins.
Step 2: Rough Milling
The raw slab arrives from the supplier with rough-sawn faces — uneven, with saw marks and sometimes minor surface checking. The first step in the shop is rough milling: running the slab through our wide drum sander or using hand planes to remove the rough surface and reveal the true grain beneath.
This is often the most exciting moment in the build. The first pass of the sander reveals the full depth and character of the grain — the flowing lines, the natural figure, the colour variation from heartwood to sapwood. It's the moment the slab comes alive.
Step 3: Flattening
A raw slab is rarely perfectly flat. Wood moves as it dries, and most slabs have some degree of cup, bow, or twist. Before we can build a table, both faces of the slab need to be perfectly flat and parallel.
We use a CNC router sled for flattening — a large flat frame that holds a router at a consistent height while it passes over the slab in overlapping passes. This is precise, time-consuming work. A 96" walnut slab can take 2–3 hours to flatten properly.
Once both faces are flat, we run the slab through the drum sander again to remove the router marks and bring the surface to a consistent smoothness.
Step 4: Void and Crack Filling
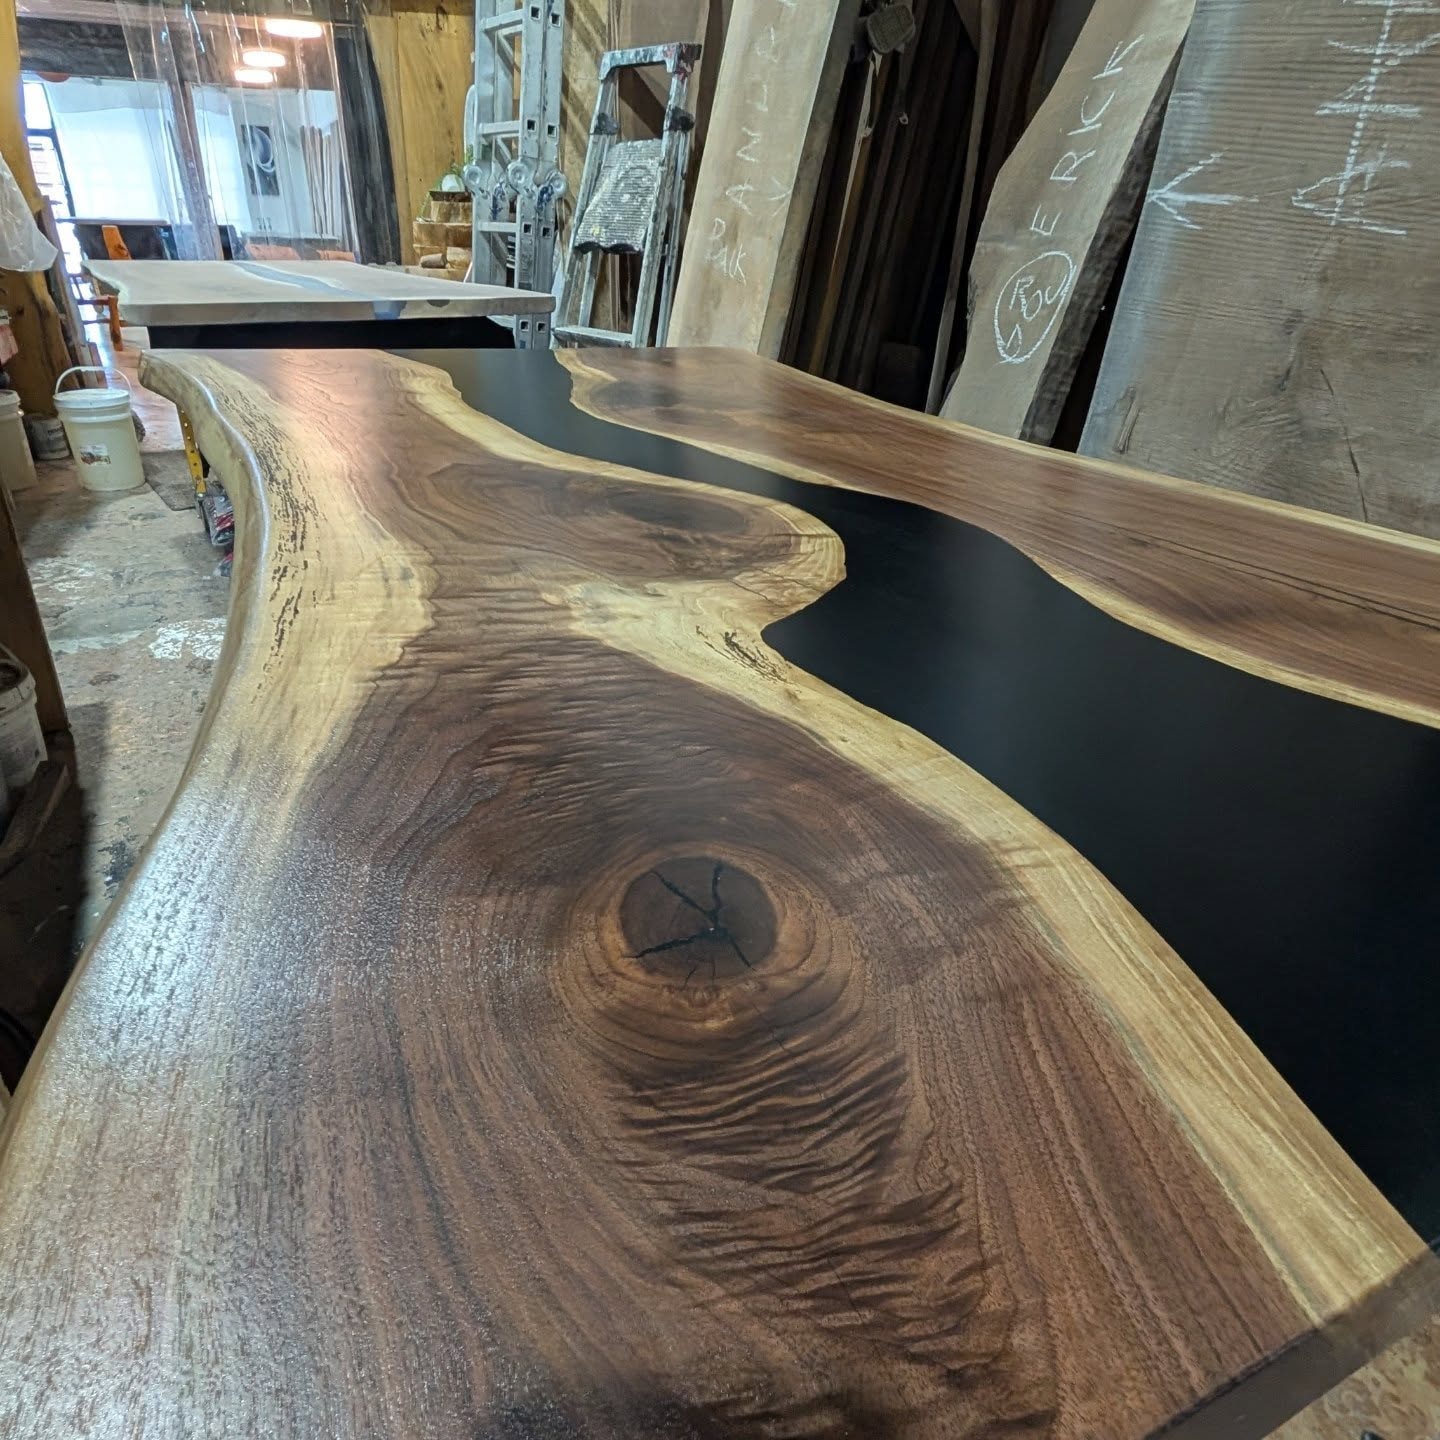
Natural voids, cracks, and knots are part of what makes walnut slabs beautiful — but they need to be stabilized before the table can be used. We fill them with epoxy resin, which bonds to the wood fibres and creates a hard, stable fill that won't shrink or crack over time.
The epoxy is mixed, coloured (if requested), and poured into the voids in layers. Each layer needs to cure for 24 hours before the next pour. Depending on the depth of the voids, this step can take 2–5 days.
Once the epoxy is fully cured, we sand it flush with the surface of the slab. A well-filled void should be invisible from a distance — you only notice it when you look closely.
Step 5: Shaping the Live Edge
If the table has a live edge, this is the step where we clean up the natural edge of the slab. We remove any loose bark, smooth the transition between the natural edge and the finished surface, and address any areas where the edge has checking or instability.
This work is done by hand — chisels, rasps, and sandpaper — because every live edge is different. The goal is to preserve as much of the natural contour as possible while creating an edge that is smooth, stable, and beautiful.
Step 6: Final Sanding
Sanding is the step that separates a good table from a great one. We sand the slab through progressively finer grits — 80, 120, 150, 180, and 220 — until the surface is perfectly smooth and ready for finishing.
Between each grit, we wipe the surface with a damp cloth to raise the grain, allow it to dry, and then sand again. This process, called "raising the grain," ensures that the finished surface won't feel rough after the first time it gets wet.
Final sanding at 220 grit takes 2–4 hours for a standard dining table. It's not glamorous work, but it's what makes the finish look exceptional.
Step 7: Base Fabrication
While the slab is being prepared, our steel fabricator builds the base. We work with a local Calgary fabricator for our steel bases — X legs, U legs, trestle frames, and custom designs.
The base is cut, welded, ground smooth, and powder-coated in the customer's chosen colour. Matte black is our most popular finish, but we can match virtually any colour.
Solid wood bases are built in-house from the same species as the tabletop, or from a complementary species.
Step 8: Finishing
The finishing process begins with a thorough wipe-down of the slab to remove all sanding dust. We then apply the first coat of Osmo Hardwax Oil with a lint-free cloth, working in the direction of the grain.
Osmo is a penetrating finish — it soaks into the wood fibres rather than forming a film on top. The first coat is absorbed quickly and visibly darkens and enriches the grain. We allow it to cure for 8–12 hours, then lightly sand with 0000 steel wool to knock down any raised grain.
The second coat goes on the same way. Most of our tables receive two to three coats of Osmo, with light sanding between each coat. The final coat is buffed with a clean cloth to a consistent sheen.
Step 9: Assembly
The slab is attached to the base using wooden buttons or Z-clips — small hardware pieces that fit into a groove routed along the inside of the base frame. These allow the slab to expand and contract seasonally without stressing the joints or cracking the wood.
This is a critical detail that separates quality furniture from furniture that will fail over time. Wood moves — it's not optional. A table that doesn't accommodate that movement will eventually crack or warp.
Step 10: Quality Check and Photography
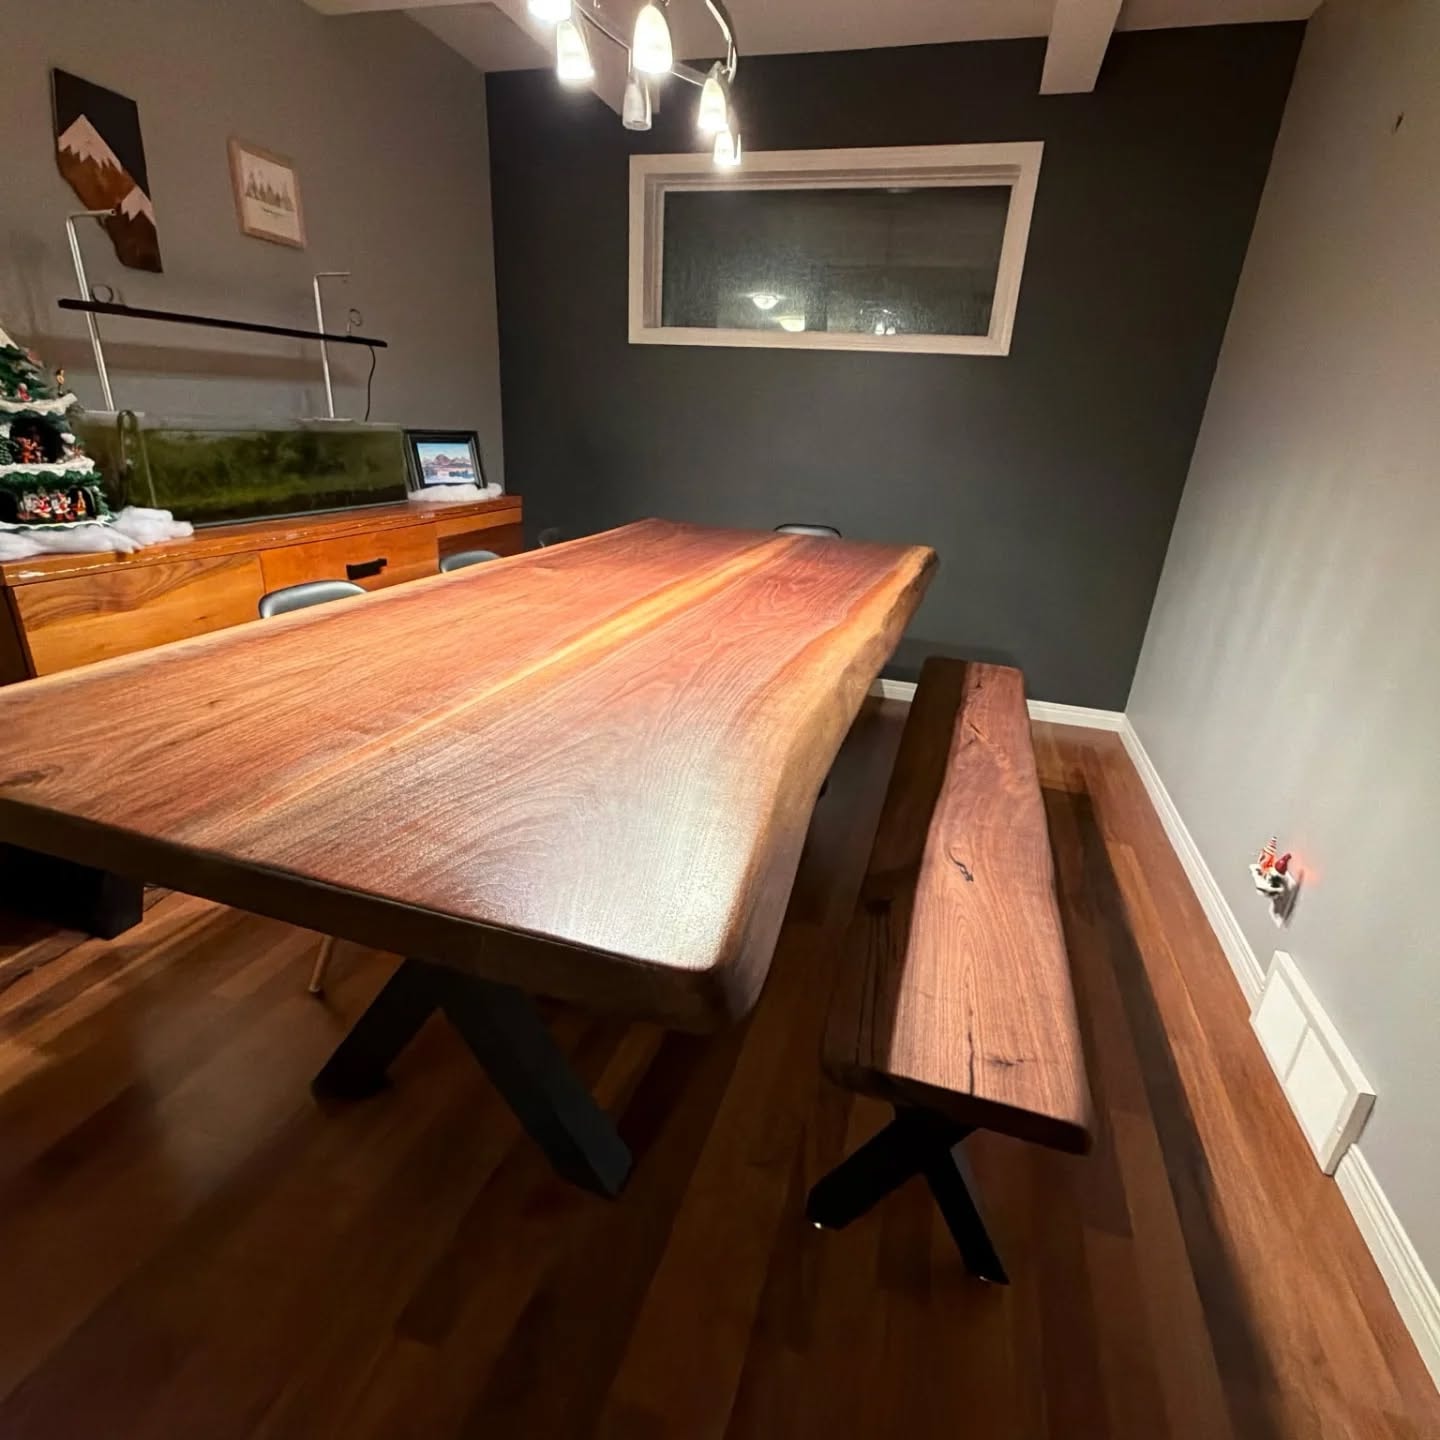
Before delivery, every table goes through a final quality check. We inspect the surface for any imperfections, check that the base is level and stable, and verify that all hardware is tight.
We also photograph every completed table in our shop. These photos go to the customer before delivery, and many end up in our gallery.
Step 11: Delivery and Installation
We deliver across Calgary and the surrounding area. For most orders, delivery and placement in your home is included. We'll bring the table in, set it up in your dining room, and make sure it's level and stable before we leave.
For Canada-wide shipping, we work with freight carriers experienced in handling large furniture pieces. The table is wrapped in moving blankets and secured in a custom crate for transit.
The Timeline
A standard custom walnut dining table takes 4–8 weeks from order to delivery, depending on our current build queue and the complexity of the piece. Epoxy river tables take longer — typically 6–10 weeks — due to the multiple pour-and-cure cycles required.
We'll give you a specific timeline when you place your order, and we'll keep you updated throughout the build.
See It for Yourself

If you're in Calgary, you're welcome to visit our shop to see a build in progress. We love showing customers what goes into a custom table — it's the best way to understand the value of what you're getting.
Ready to start your own? Design your table online or contact us to schedule a consultation.
Ready to commission your custom walnut dining table? Design your table with Calgary Wood Works — handmade in Calgary and shipping across Canada.
Explore Topics
Written by
Calgary Wood Works
Content creator and writer sharing insights and stories.


